
supervisionとは、YCombinatorなどのベンチャーキャピタルから出資を受けているRoboflowというスタートアップが公開している、メディア解析におけるデータ可視化、処理を簡素化するツールセットです。このライブラリを使うことで物体検出やセグメンテーションの結果を扱う際の手間を削減し、効率的な開発を実現することができます。
いわゆるUltralyticsエコシステムにおいてはデータセットの部分で出てきているのですが、YOLO11にRoboflow supervisionを組み合わせることでカンタンにビジュアルの変化を付けることができます。
長期的に観察しているわけではないのですが、supervisionを通してYOLOの利用例が出てくると、それがUltralytics YOLO側でも活用事例として挙げられるようになったように思います。

コア部分としては様々なライブラリを利用することが出来、FacebookのMetaのOSSであるDetectron2を使うことも出来ます。
// Detectron2を使うサンプルコード

import cv2
import supervision as sv
from detectron2.engine import DefaultPredictor
from detectron2.config import get_cfg


image = cv2.imread(<SOURCE_IMAGE_PATH>)
cfg = get_cfg()
cfg.merge_from_file(<CONFIG_PATH>)
cfg.MODEL.WEIGHTS = <WEIGHTS_PATH>
predictor = DefaultPredictor(cfg)

result = predictor(image)
detections = sv.Detections.from_detectron2(result)Google Colabで試す
まずはYOLOのみで実行します。
画像は「ぱくたそ」さんのヨガ画像を使います。
!pip install ultralytics supervision

from ultralytics import YOLO

# Load a model
model = YOLO("yolo11n.pt")  # load model

# Predict with the model
results = model("/content/yoga.jpg",save=True,project="/content/",name="yolov11-save",show_boxes=True)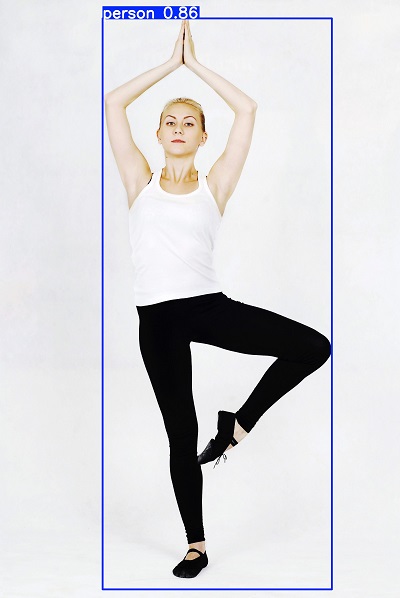
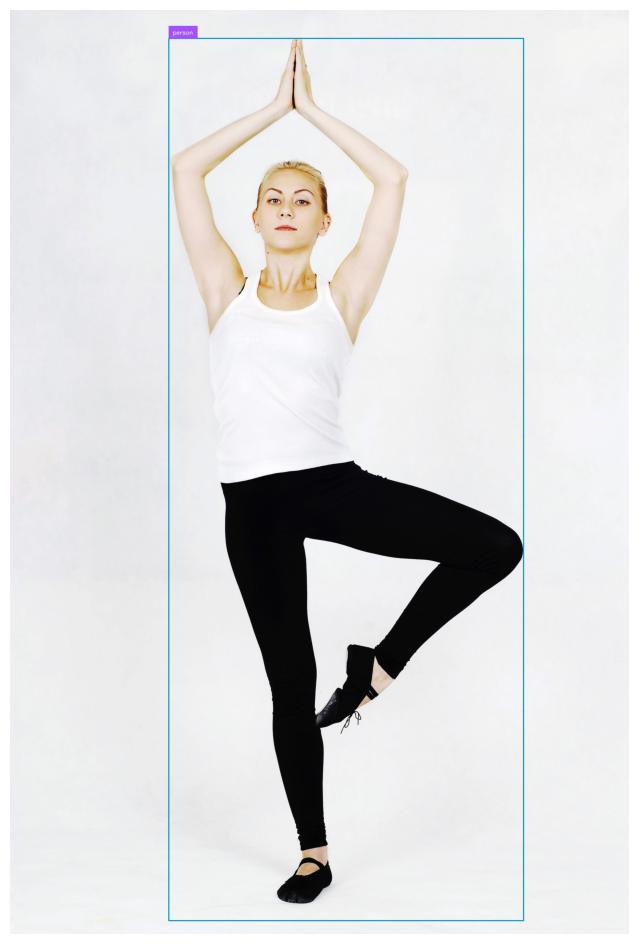
supervisionを使います。
色をデフォルトパレットから変えています。また「annotated_image」に対してアノテイターを重ねるという処理をしています。つまり、ultralytics YOLO11のコードの中身を編集せず、ここでパラメータ指定したりアノテイターを重ねることで見た目をカンタンに変化させることが出来ます。
import cv2
import supervision as sv
from ultralytics import YOLO

model = YOLO("yolo11n.pt")  # load model
image = cv2.imread("/content/yoga.jpg")

results = model(image)[0]

detections = sv.Detections.from_ultralytics(results)

bounding_box_annotator = sv.BoundingBoxAnnotator()
bounding_box_annotator.color = sv.Color(r=0, g=148, b=202)  # 色を変更
# bounding_box_annotator.color = sv.Color.BLUE # 青にしたい時

label_annotator = sv.LabelAnnotator()

labels = [
    model.model.names[class_id]
    for class_id
    in detections.class_id
]

annotated_image = bounding_box_annotator.annotate(scene=image, detections=detections)
annotated_image = label_annotator.annotate(scene=annotated_image, detections=detections, labels=labels)

sv.plot_image(annotated_image) # google colab上で表示
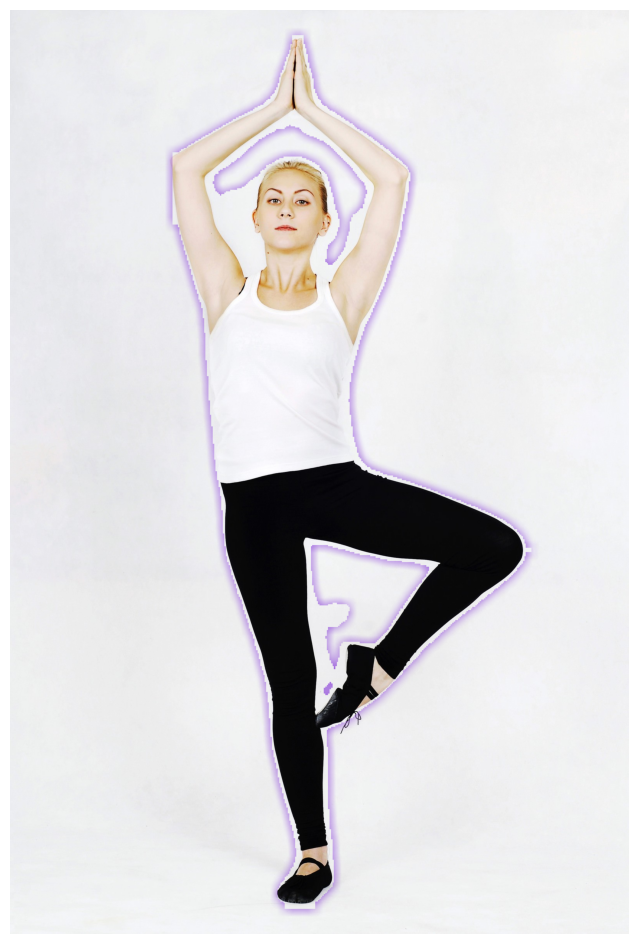
エフェクト効果をつける
ハロー効果という、いわゆる後光が差すようなエフェクトを入れるのも、アノテイターを重ねるだけで実現できます。
この場合、モデルには境界を判定する seg を使います。
# halo 効果

import cv2
import supervision as sv
from ultralytics import YOLO

model = YOLO("yolo11x-seg.pt")
image = cv2.imread("/content/yoga.jpg")
results = model(image)[0]

halo_annotator = sv.HaloAnnotator()
detections = sv.Detections.from_ultralytics(results)

annotated_frame = halo_annotator.annotate(scene=image.copy(),detections=detections)

sv.plot_image(annotated_frame)
supervision 動画処理
公式には2種類(3種類?)の動画読み込み方法が紹介されています。
1. get_video_frames_generator関数
2. process_video関数
3. opencvを使ってゴリゴリ
opencvを使ってゴリゴリはもはや力業なので省くとして、それぞれご紹介します。
get_video_frames_generatorを使う
VideoSinkクラスと組み合わせて使います。
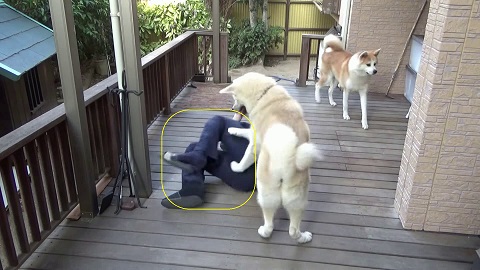
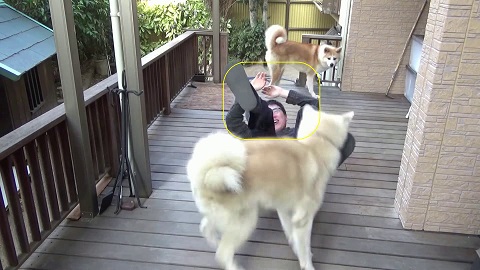
分析対象の動画は高須幹也氏のYouTube「ヤラセ無し!秋田犬ドッキリ企画 飼い主が突然倒れるとどんなリアクションするのか!?」( https://www.youtube.com/@takasumikiya )です。
コードの説明は結果画像の下に記載しています。
import supervision as sv
from ultralytics import YOLO

model = YOLO('yolo11x.pt')

round_box_annotator = sv.RoundBoxAnnotator()
round_box_annotator.color = sv.Color.YELLOW

video_info = sv.VideoInfo.from_video_path(video_path="/content/mikiyatakasu.mp4")
frame_generator = sv.get_video_frames_generator(source_path="/content/mikiyatakasu.mp4")
tracker = sv.ByteTrack(frame_rate=video_info.fps)
smoother = sv.DetectionsSmoother()

with sv.VideoSink("/content/mikiya-san.mp4", video_info=video_info) as sink:

  for index, frame in enumerate(frame_generator):

    result = model(frame,max_det=3)[0]

    detections = sv.Detections.from_ultralytics(result)
    detections = detections[detections.class_id == 0]
    detections = tracker.update_with_detections(detections)
    detections = smoother.update_with_detections(detections)

    annotated_frame = round_box_annotator.annotate(frame.copy(), detections)

    sink.write_frame(annotated_frame)

VideoInfoクラスを使うことで、動画の情報を取得できます。
https://supervision.roboflow.com/latest/utils/video/#supervision.utils.video.VideoInfo
# VideoInfo(width=3840, height=2160, fps=25, total_frames=538)

tracker = sv.ByteTrack(frame_rate=video_info.fps) # fps数値を利用
write_frame()を使うことで、指定したフレーム画像を映像に保存することが出来ます。コードだとアノテイターを重ねているので annotated_frame としています。
sink.write_frame(annotated_frame)検出対象の上限設定は以下のように書きます。お気付きかも知れませんが、ここは普通にYOLO11を使ってるだけです。
result = model(frame,max_det=3)[0]人間だけにアノテーションを付けたいので、以下のようにクラス指定します。
detections = detections[detections.class_id == 0]クラスはこちらに記載があります。https://github.com/ultralytics/ultralytics/blob/main/ultralytics/cfg/datasets/coco.yaml
process_videoを使う
import numpy as np
import supervision as sv
from ultralytics import YOLO

model = YOLO('yolo11x.pt')

tracker = sv.ByteTrack()
round_box_annotator  = sv.RoundBoxAnnotator ()
round_box_annotator.color = sv.Color.YELLOW

def callback(frame: np.ndarray, _: int) -> np.ndarray:
    results = model(frame)[0]
    detections = sv.Detections.from_ultralytics(results)
    detections = detections[detections.class_id == 0]
    detections = tracker.update_with_detections(detections)
    return round_box_annotator.annotate(frame.copy(), detections=detections)

sv.process_video(
    source_path="/content/mikiyatakasu.mp4",
    target_path="mikiya-san-processvideo.mp4",
    callback=callback
)
このブログの設定か、get_video_frames_generatorの方が少しキレイに見えるかもしれません。
ただ、キレイさを追求したり、何か処理をガリガリやってくのであれば、ultralytics yolo をゴリゴリ書き換えた方がいいと思います。


